SPONSORED
HOW DO I CREATE AN OLD MONEY BLOWDRY?
ASK THE EXPERTS with KY WILSON
Bring the old money blow-dry into a modern space and create something that's more refined, more wearable, and ultimately more flattering for clients
The Stylist Hack:
To modernise the Old Money Blowdry, your technique needs to shift. It’s not about big hair for the sake of it. It’s about touchable volume and movement that enhances the natural texture, brings out shine, and feels undone but controlled. The key to getting this right is all in the prep, the manipulation, and the cool-down.
The “Old Money” blow-dry trend is back - think full-bodied volume, soft bends, and polished shine that feels expensive but effortless. It’s that quiet luxury hair moment we’re seeing all over social. But here’s the catch: when people try to recreate it exactly as it was done 20 years ago, it can easily look dated, overly structured, and even ageing. The trick is to borrow the essence of the look - the volume, the movement, the glamour -without the stiffness.
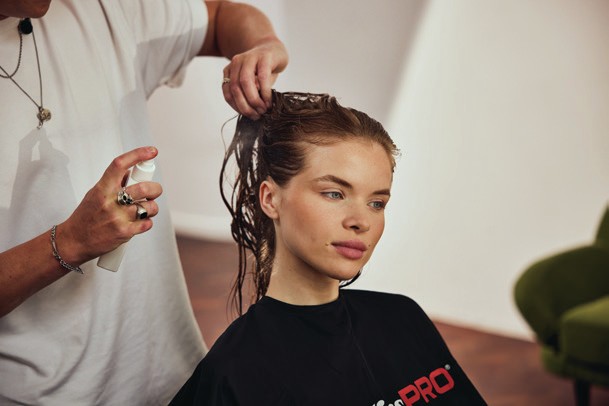
Step 1: Prep hair
Before you even switch on a tool, proper prep is essential. This style is built from the roots up, so volume starts with the right product. Apply a light volumising or thickening product to damp hair, focusing on the roots but distributing through the mid-lengths and ends. This adds grip and helps shape the foundation for the blow-dry.
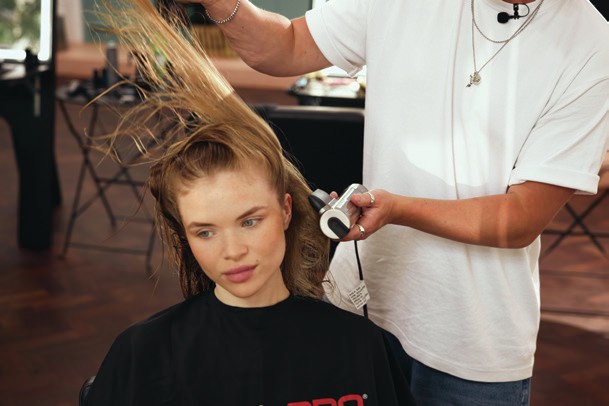
Step 2:Directional blowdry
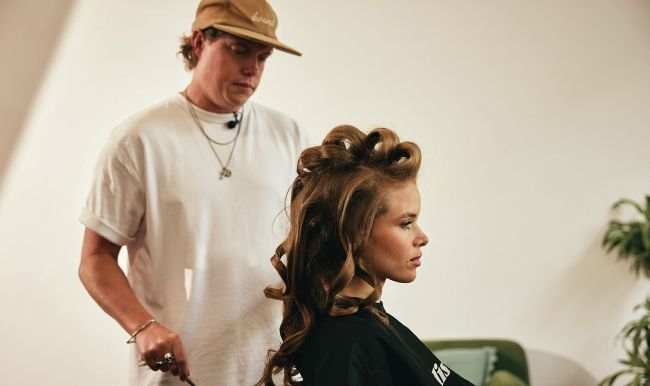
I used the new BaBylissPRO Drying Wand with the nozzle attachment, and started by directionally blow-drying sections of the hair back on themselves. This technique pushes the roots in the opposite direction of where they’ll fall, instantly building lift and volume. Keep the heat and speed on medium, as this gives you control while avoiding damage or flyaways.
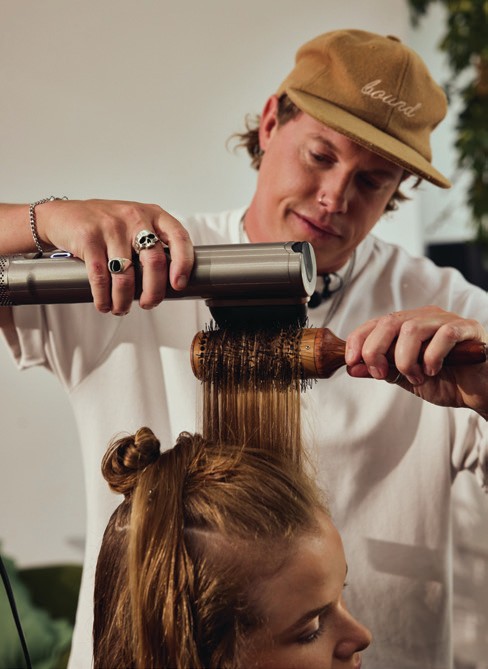
Step 3: Use tools to shape
Once the hair is about 80% dry, move in with a round brush with the Drying Wand. The goal here isn’t to smooth the hair flat - it’s to create a soft bend and movement that gives structure without looking too styled. Focus on lifting the roots and shaping the ends to create that luxe, voluminous feel. This is where the Drying Wand comes into its own, with the super concentrated air flow doing exactly what you need.
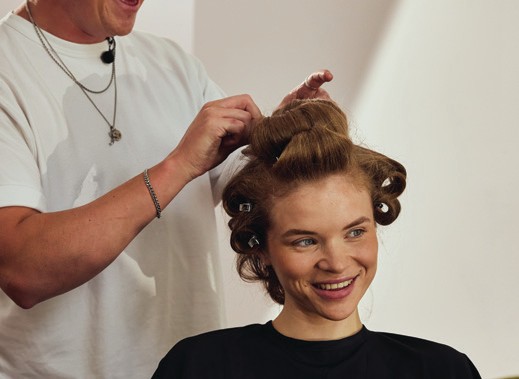
Step 4: Set and cool
This is where many people go wrong. Heat shapes the hair, but cooling sets it. Once each section is styled, roll it into a loose pin curl and allow it to fully cool. This sets the shape, holds the volume, and makes sure the blow-dry lasts. Skip this step, and you’ll lose half the effect by lunchtime.
“THIS IS ABOUT HAIR THAT MOVES, SHINES, AND LOOKS HEALTHY. IT’S NOT OVERLY STYLED, IT'S NOT RIGID. IT’S THE KIND OF FINISH THAT ELEVATES ANY LOOK, WHETHER IT’S OFF-DUTY DENIM OR SOMETHING MORE POLISHED, WITHOUT TRYING TOO HARD.”
Step 5: Brush out and finsih
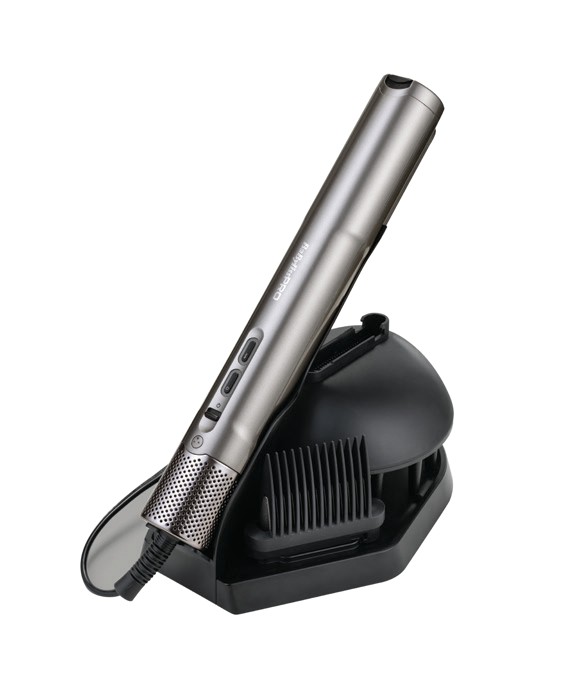
Key Product BaByliss PRO Drying Wand
Once the hair is completely cool, take out the pins and brush through the set. Use a soft paddle brush or a wide-tooth comb to break up the structure and blend the bends. This final brush-out is what makes the look feel effortless and expensive. The volume is there, the shine is boosted, and the movement is natural, not overdone.